Setting up the Wix Advanced Booking Page Builder is very easy. The addition of a plugin involves three simple steps –
- Add the plugin to your Wix service page.
- Enable the Service Page from the Bookings.
- Add Rich Content using the Ricos Editor in CMS Collection.
ADD THE PLUGIN TO YOUR WIX SERVICE PAGE #
You can add the Advanced Booking Page Builder Plugin from the Booking Service Page. The plugin adds as an extension of your Wix Booking App. You can do this using two different methods –
Install Directly From App Market #
The first way is to install the app from the Wix App Market. Go to this link and click on the “Add To Site” button on the app landing page. Follow the next steps, like giving permission and installing the Wix Bookings App in case it is not already installed on your website. Once the app is installed, the plugin will be automatically added to your Wix Booking service page.
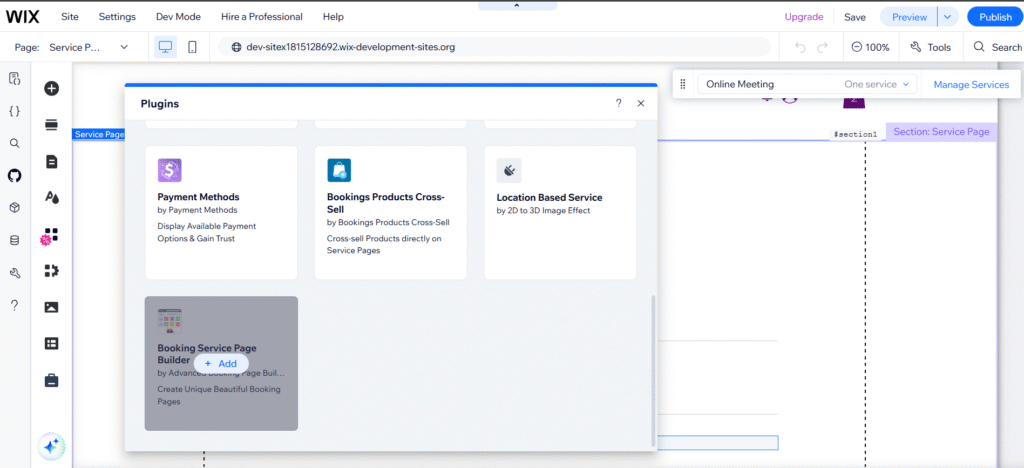
INSTALL FROM THE BOOKING SERVICE PAGE #
The second method is to install the plugin directly from the Wix Bookings service page. To use this method, the Wix Bookings App must be installed on your Wix website. Go to your Wix Booking Service Page, go to the plugins tab, and add Booking Service Page Builder.
Enable the Service Page #
This is the most important step in using this app. By default, all Wix Booking Services go to the calendar page instead of the service page, bypassing the service page. If you want to make sure that your visitors see the service page before going to the booking calendar, you need to change one simple setting in the Book Onlike page as shown in the video below –
Go to Book Online Page> Settings>Clicking on the service name or image will take clients to the:>Select Service Page.
Once the plugin is connected, you can start building the pages as shown in the next article.


